Have you ever truly stopped to consider what’s in the soap you use daily? I confess, for the longest time, I just grabbed whatever was convenient at the store, never giving a second thought to those impossibly long ingredient lists.
But in our increasingly conscious world, with so much talk about sustainable living and the hidden nasties in everyday products, I couldn’t shake the feeling that there had to be a better way.
That’s exactly why I decided to roll up my sleeves and dive headfirst into the fascinating realm of natural soap making! From my own experience, I can tell you that this isn’t just some fleeting trend; it’s a deeply satisfying journey that offers complete control over what you’re putting on your skin and into the environment.
It’s been incredibly eye-opening, revealing not only the surprising simplicity of crafting pure, gentle cleansing bars but also the sheer joy of creating something truly personal.
If you’re looking to embrace a more mindful approach to self-care or simply want to explore the wonders of handmade goods, you’re in for a treat. Let’s delve into the beautiful alchemy of natural soap and discover how easy it is to make your own nourishing creations.
Embracing the Alchemy: Decoding the Art of Natural Soap Making
What a journey it’s been, diving into the world of natural soap making! I remember vividly the day I first thought, “Could I really make my own soap?” It seemed daunting, almost like a secret whispered only among seasoned crafters.
But honestly, once you peel back the layers, it’s a surprisingly straightforward, incredibly rewarding process. The magic truly begins when you understand the fundamental chemical reaction that transforms simple oils and lye into those nourishing bars we love.
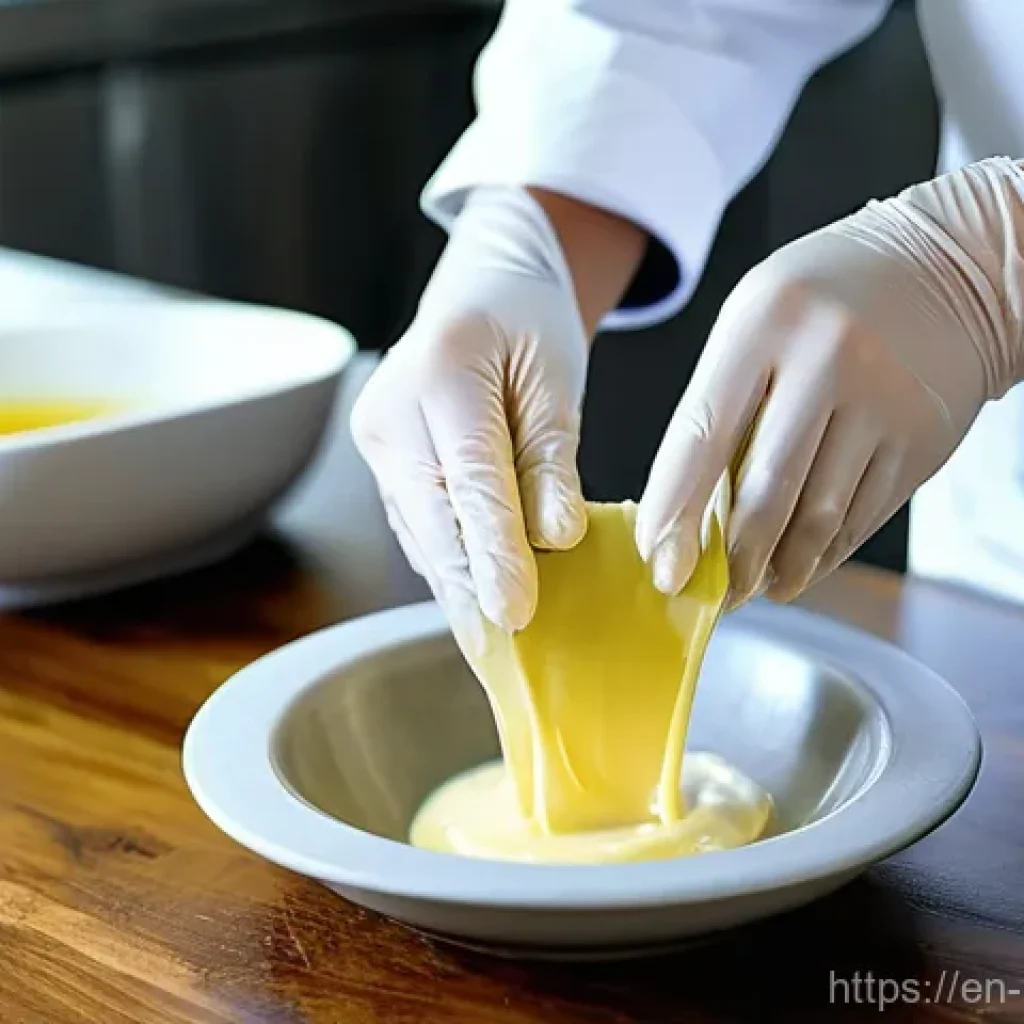
This process, known as saponification, is where all the alchemy happens. It’s not just mixing ingredients; it’s watching a beautiful transformation unfold right before your eyes, creating something entirely new with properties far superior to many commercial options.
For me, understanding this core principle was like unlocking a secret level in a video game – suddenly, everything made sense, and the fear of the unknown melted away.
It gave me the confidence to experiment, to truly own the creation process, and to feel a profound connection to the products I was using on my own skin.
The Heart of the Matter: What is Saponification, Anyway?
Okay, so let’s get a little scientific for a moment, but don’t worry, I promise to keep it light and relatable! At its core, saponification is the chemical reaction that occurs when a fat or oil (think olive oil, coconut oil, shea butter) reacts with an alkali (which, in soap making, is typically sodium hydroxide, or lye, dissolved in water).
The lye breaks down the triglycerides in the oils, and they recombine to form soap (a salt of a fatty acid) and glycerin. This isn’t just some abstract science experiment; it’s what makes soap, well, soap!
What I’ve learned is that it’s a non-negotiable step; you simply can’t make true soap without lye. And yes, I know the word “lye” can sound a bit intimidating, conjuring up images of harsh chemicals, but hear me out: once the saponification process is complete and the soap has cured, there is no lye left in the finished product.
It’s all transformed, leaving behind gentle, skin-loving goodness. Trust me, I was skeptical at first too, but seeing (and feeling!) the results truly solidified my understanding and trust in the process.
Unveiling the Methods: Cold Process, Hot Process, and Melt & Pour
When you first start exploring soap making, you’ll quickly discover there are a few main paths you can take. The most common for beginners, and certainly my personal favorite for the creative freedom it offers, is the Cold Process method.
This is where you mix your oils and lye solution at relatively low temperatures, pour the mixture into a mold, and then let it cure for several weeks.
It’s a bit of a waiting game, but oh, the anticipation! Then there’s the Hot Process method, which involves cooking the soap mixture, usually in a slow cooker, until saponification is complete.
This speeds up the process significantly, meaning your soap is ready to use much faster, often within a day or two of coming out of the mold, though it might have a more rustic appearance.
Finally, there’s the Melt & Pour method, which is fantastic for kids or those who want to avoid handling lye entirely. You buy pre-made soap bases, melt them down, add your desired scents and colors, and pour them into molds.
While it’s super easy and fun, it doesn’t give you the same level of control over ingredients or the sense of accomplishment as crafting soap from scratch.
For me, the Cold Process truly captures the essence of handmade, allowing me to carefully select every oil and additive, ensuring each bar is exactly what I envisioned.
Stocking Your Sanctuary: The Essential Toolkit for Natural Soap Artisans
When I first decided to dive into natural soap making, I pictured a cluttered basement laboratory, filled with exotic chemicals and complicated machinery.
Boy, was I wrong! You’d be surprised how many of the essentials you might already have lurking in your kitchen cupboards. The beauty of it is that you don’t need a huge investment to get started.
What you do need, however, are dedicated tools that won’t be used for food preparation once they’ve been introduced to lye. This separation is crucial for safety and peace of mind.
Over time, I’ve refined my collection of tools, finding what truly works best for efficiency and safety. It’s like building a chef’s kitchen, but for your skin!
Every piece has a purpose, from the precise measurements of a digital scale to the gentle mixing of an immersion blender, each playing a vital role in crafting the perfect bar.
The Non-Negotiables: Your Safety First Arsenal
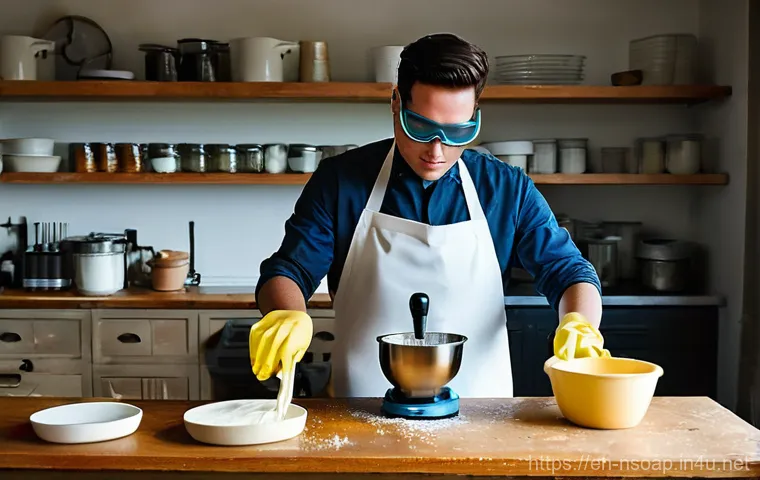
Before you even think about mixing oils and lye, you absolutely *must* prioritize safety. I can’t stress this enough! Lye is a caustic substance in its raw form, and while it completely transforms into something benign in the final soap, you need to treat it with respect during the making process.
From my own experience, rushing or cutting corners on safety is simply not worth the risk. My go-to safety kit includes sturdy rubber gloves that go up to my forearms, eye protection (goggles are a must – regular glasses aren’t enough!), and long-sleeved clothing.
Always work in a well-ventilated area, and never, ever make soap when children or pets are underfoot. I learned this lesson early on when my cat, curious as ever, tried to investigate my setup.
Now, my soap-making sessions are strictly solo, focused, and uninterrupted. It’s not just about protecting yourself; it’s about creating a safe environment where you can focus on the craft without worry.
Gearing Up: My Go-To Tools and Supplies
Beyond the safety gear, there’s a core set of equipment that makes the soap-making process smooth and enjoyable. First up, a reliable digital kitchen scale is paramount – soap making is a science, and precise measurements are non-negotiable for a successful batch.
You’ll need heat-resistant containers, preferably stainless steel or heavy-duty plastic, for mixing your lye solution and your oils. An immersion blender (also known as a stick blender) is an absolute game-changer; it dramatically speeds up the emulsification process, getting you to “trace” much faster than hand-stirring.
Molds, of course, are essential for shaping your soap. You can start with simple silicone loaf molds or even lined cardboard boxes, but there are countless creative options out there.
And don’t forget measuring cups and spoons for fragrances and additives, as well as a spatula or two for scraping down bowls. It really is an exciting process, collecting these tools and setting up your dedicated workspace, knowing each item contributes to the creation of something beautiful and beneficial.
| Tool/Supply | Purpose | Pro Tip (from my experience!) |
|---|---|---|
| Digital Scale | Accurate measurement of oils, lye, and water. Essential for safe and successful saponification. | Don’t skimp here! Precision is key. A good scale makes all the difference for consistent results. |
| Safety Goggles | Protects eyes from accidental lye splashes. | Always wear them, no matter how quick you think the task will be. Seriously. |
| Rubber Gloves | Protects hands from lye and raw soap batter. | Go for sturdy, dishwashing-style gloves that extend up your forearms. |
| Immersion Blender | Speeds up emulsification (mixing oils and lye solution) to reach “trace”. | Life-saver! A good quality one saves your arm and gets you to trace in minutes. |
| Heat-Resistant Containers | For mixing lye water and melting oils. Stainless steel or heavy-duty plastic. | Designate these solely for soap making. Avoid using them for food afterwards. |
| Silicone Molds | To pour and shape your soap. | Start with a simple loaf mold. Silicone is easy for unmolding. |
| Thermometer | To monitor oil and lye solution temperatures. | Helps ensure your oils and lye are at the right temperatures for mixing. |
The Building Blocks: Oils, Lye, and Water – Your Core Ingredients
It might sound overly simplistic, but truly, the essence of soap making boils down to just three core components: oils, lye, and water. Yet, within these seemingly simple elements lies a world of complexity and choice that directly impacts the final characteristics of your soap.
It’s like baking; you start with flour, sugar, and eggs, but the type of flour, the ratio, and any added flavors completely change the outcome. When I first started, I was overwhelmed by the sheer variety of oils available.
Did I need olive oil, coconut oil, palm oil, or something more exotic like tamanu? What I quickly learned is that each oil brings its own unique properties to the bar – some make it harder, some produce a creamy lather, others add conditioning properties.
This is where the real fun, and the real customization, comes in! Choosing your blend of oils is like being a chef, crafting a recipe that perfectly suits your skin and preferences.
The Foundation: Deciphering the World of Oils and Butters
Oh, the glorious oils and butters! This is where you truly get to play. When I’m formulating a recipe, I always think about the “feel” I want the soap to have.
Coconut oil, for instance, is a superstar for big, bubbly lather and hardness, but too much can be drying. Olive oil, on the other hand, gives a wonderfully mild, conditioning bar with a creamy lather, but it makes for a softer soap that needs a longer cure.
Then you have the luxurious butters like shea butter or cocoa butter, which add incredible conditioning and hardness. From my personal trials, I’ve found a balanced blend is usually best.
A typical recipe might include a high percentage of olive oil for mildness, a good amount of coconut oil for lather, and a touch of shea or cocoa butter for that extra skin-loving goodness.
Experimenting with different combinations and seeing how they affect the final bar is one of the most exciting parts of this entire journey, letting you tailor each batch to perfection.
The Transformative Power: Lye and Its Indispensable Role
Okay, let’s tackle the elephant in the room again: lye. Sodium hydroxide, or caustic soda, is an absolutely non-negotiable ingredient for making true, hard bar soap from scratch.
Without it, you’re simply not making soap; you’re making a mixture of oils. I know, I know, it sounds scary, and it demands respect and careful handling, but it’s crucial.
When you dissolve lye in distilled water, it creates a powerful alkaline solution that then reacts with the oils. This is where saponification kicks off!
The key takeaway here, and something that truly brought me peace of mind, is that all the lye is consumed during the saponification process. Once your soap has cured for several weeks, there’s no active lye left in the bar.
What you’re left with is a gentle, skin-cleansing product, complete with natural glycerin that’s a byproduct of the process – something often stripped out of commercial soaps.
Trusting this chemical transformation was a huge step for me, and it opened up the door to making truly natural, safe, and effective soaps.
The Unsung Hero: Water and the Role of Additives
While oils and lye get most of the glory, water plays a surprisingly vital role in soap making. It acts as the solvent for the lye, allowing it to dissolve and react effectively with the oils.
Distilled water is usually recommended to avoid any impurities or minerals from tap water that could potentially interfere with the saponification process or cause discoloration.
But water isn’t just a solvent; it’s also where you can start introducing other liquids like milks (goat milk, coconut milk) or even strong brewed coffee or tea, which can add conditioning properties, scent enhancement, or subtle color to your finished bar.
And beyond the liquid, this is also where the fun of additives comes in! I love experimenting with natural colorants like clays (kaolin, bentonite) or botanicals (spirulina, turmeric, activated charcoal) to give my soaps beautiful hues.
Essential oils are my go-to for scent, offering therapeutic benefits beyond just smelling good. My personal favorites are lavender and peppermint for a refreshing and calming experience.
These little extras are what truly make each batch uniquely yours, turning a functional item into a work of art.
Navigating the Maze: Troubleshooting Common Soap Making Hurdles
Even after countless batches, I still sometimes face little quirks with my soap. It’s just part of the creative process, right? There have been times when I’ve confidently poured my batter, only to wake up the next morning to a batch that looks…
well, not quite right. It can be incredibly frustrating, especially when you’ve invested time and precious ingredients. But what I’ve learned through all these trials and tribulations is that most common soap making issues are actually quite fixable or, at the very least, understandable.
It’s all part of the learning curve, and honestly, each “oops” moment has taught me something invaluable about the chemistry and art behind soap making.
Instead of throwing in the towel, I’ve started viewing these hiccups as puzzles to solve, opportunities to deepen my understanding and refine my technique.
It’s truly empowering to turn a perceived failure into a learning experience, and often, salvage a perfectly good bar of soap in the process!
The Mystery of the No-Trace Batch: Why Isn’t My Soap Thickening?
Ah, the dreaded “no trace” scenario! I remember my first time, stirring and stirring with my immersion blender, waiting for that magical moment when the mixture would thicken to a pudding-like consistency, leaving a “trace” when drizzled on the surface.
And nothing. It just stayed liquid. My heart sank, thinking I’d completely messed it up.
Usually, if your soap isn’t tracing, it means the oils and lye solution haven’t fully emulsified and saponification hasn’t properly begun. Common culprits?
The temperatures of your oils and lye solution might be too far apart, or perhaps you haven’t blended long enough. Sometimes, certain oils, like a high percentage of olive oil, can take a *very* long time to trace, testing your patience!
My solution? Keep blending! Sometimes, all it needs is a little more time and consistent stick-blending.
If after a significant amount of blending it still doesn’t budge, it might be a measurement error, but usually, persistence pays off. It’s a true test of patience, but reaching that perfect trace is incredibly satisfying.
The Not-So-Pretty Patches: Dealing with Soda Ash
Have you ever made a gorgeous bar of soap, only for it to develop a dull, white, powdery film on the surface a day or two later? That, my friends, is soda ash, and it’s a super common occurrence in cold process soap.
I confess, when I first saw it, I thought my soap had gone bad or I had somehow ruined it. It definitely doesn’t look pretty, but here’s the good news: soda ash is purely cosmetic and completely harmless!
It forms when unsaponified lye on the surface of the soap reacts with carbon dioxide in the air. While it doesn’t affect the quality or cleansing power of your soap, it can be a bit of an aesthetic bummer.
What I’ve found helps prevent it is to insulate your soap molds well after pouring (covering them with a blanket or towel to keep the heat in), which encourages a strong “gel phase.” A good gel phase means the soap heats up internally, which reduces the likelihood of soda ash.
You can also spritz the top of your fresh soap with rubbing alcohol immediately after pouring, or simply plane it off with a vegetable peeler or use the first lather to wash it away.
Don’t let it discourage you; it’s a small, manageable quirk of handmade soap!
The Grand Reveal: Curing and Storing Your Homemade Masterpieces
After all the careful measuring, mixing, and molding, there’s one final, crucial step before you can truly enjoy your handmade soaps: curing! When I first started, I was so eager to use my creations that I almost skipped this vital stage.
Big mistake! A freshly made bar of soap, even after it’s solid enough to unmold, isn’t quite at its peak performance. It needs time, patience, and good airflow to truly transform into the hard, long-lasting, and wonderfully mild cleansing bar you envisioned.
Think of it like aging a fine wine or cheese; the waiting period enhances its qualities, making it richer and more satisfying. It’s a lesson in delayed gratification, but one that is absolutely worth it for the superior quality you end up with.
I’ve learned that this curing stage is where the magic truly sets in, where the last whispers of any initial “rawness” completely fade away, leaving behind pure, gentle goodness.
The Art of Patience: Understanding the Curing Process
So, what exactly happens during this “curing” period? Essentially, two main things. First, any remaining water in the soap slowly evaporates.
As the water leaves, the bar becomes harder and more concentrated. A harder bar lasts significantly longer in the shower, which means you get more bang for your buck from your beautifully crafted soap!
Secondly, and perhaps even more importantly for the skin, the saponification process continues to complete itself fully, and the soap becomes milder. While most of the saponification occurs within the first 24-48 hours, a full cure (typically 4-6 weeks, sometimes even longer for high olive oil soaps) ensures that every last molecule of lye has reacted, leaving you with an incredibly gentle, skin-loving product.
I’ve personally felt the difference between a lightly cured bar and one that’s had the full six weeks; the fully cured one is noticeably harder, creates a richer lather, and feels so much more luxurious on the skin.
It really teaches you the value of patience and letting nature take its course.
Safeguarding Your Treasures: Proper Storage Techniques
Once your soaps are beautifully cured and ready to use (or gift!), proper storage is key to maintaining their quality. You wouldn’t just leave a gourmet meal out on the counter, right?
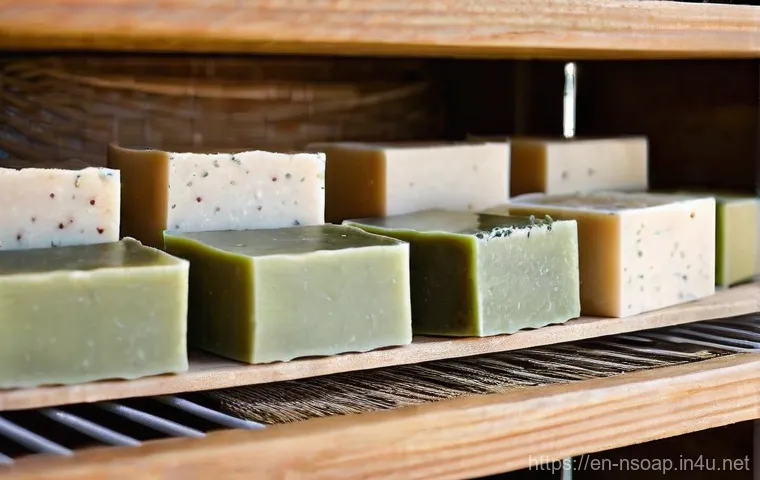
The same applies to your handmade soaps! The goal is to keep them in a cool, dry place with good air circulation until you’re ready to use them. I’ve found that storing them on a wire rack or a breathable shelf in a closet works wonders.
Avoid airtight containers, as this can trap any residual moisture and prevent proper air circulation, potentially leading to a funky smell or even dreaded “dreaded orange spots” (DOS), which is when the oils in the soap start to go rancid.
Direct sunlight can also degrade the quality and fade natural colors, so a dark space is always best. When you’re ready to use a bar, make sure to place it on a well-draining soap dish in your shower or next to your sink.
Letting it sit in a puddle of water will quickly turn your hard-earned, long-lasting bar into a mushy mess, and nobody wants that! Taking a few simple steps to store them correctly ensures that each bar delivers its best performance from the first lather to the last sliver.
글을 마치며
It’s truly been an incredible journey exploring the beautiful craft of natural soap making together. From those first hesitant steps of understanding saponification to confidently curing my latest batch, every moment has been filled with discovery and a deep sense of satisfaction.
I genuinely hope this guide has sparked your own curiosity and armed you with the confidence to embark on your very own soap-making adventure. Remember, it’s not just about making soap; it’s about connecting with a timeless craft and creating something truly nourishing for yourself and your loved ones.
What a rewarding experience it has been to share these insights with you!
알아두면 쓸모 있는 정보
1. Always double-check your lye calculations using a reliable online soap calculator. This is the single most important step for safe and effective soap. Precision prevents mishaps.
2. Consider starting with a simple, tried-and-true recipe, perhaps one heavy on olive and coconut oil, before experimenting with more exotic ingredients. This helps build confidence and understanding.
3. Don’t be afraid of “lye.” It’s a fundamental part of the chemical reaction, and it completely transforms during saponification. No active lye remains in a properly cured bar of soap.
4. Curing is not optional! Giving your soap a full 4-6 weeks to cure results in a harder, longer-lasting, and significantly milder bar. Patience truly pays off in the world of handmade soap.
5. Embrace imperfections! Handmade soap often has a rustic charm, and small aesthetic quirks like soda ash are completely normal and don’t affect the soap’s quality. Each bar tells a story.
중요 사항 정리
Making natural soap from scratch is a deeply fulfilling endeavor that blends chemistry with creativity. Prioritize safety with proper gear and ventilation when handling lye.
Precision in measurements is paramount for successful saponification. Understanding the unique properties of different oils allows for customized recipes.
And finally, patience during the curing process is key to achieving a hard, long-lasting, and wonderfully gentle bar of soap. It’s an art, a science, and a journey all rolled into one beautiful, bubbly experience.
Frequently Asked Questions (FAQ) 📖
Q: Why should I even bother making my own natural soap when there are so many fantastic options already on store shelves?
A: Oh, I totally get it! For years, I was just like you, grabbing whatever was on sale or smelled nice, never really giving a second thought to what was actually in those fancy bars.
But honestly, once you start looking closer, you realize that many commercial soaps are less “soap” and more “detergent bar” packed with synthetic fragrances, harsh chemicals, and fillers that can strip your skin and even irritate it.
Trust me, I’ve been there with dry, itchy skin, wondering what was going on. Making your own natural soap is like hitting the reset button. It gives you 100% control over every single ingredient.
You get to choose nourishing oils like olive, coconut, or shea butter, add soothing essential oils, and completely avoid all those “hidden nasties” and unpronounceable chemicals.
My skin has never felt happier or healthier, and knowing exactly what’s going into my daily routine? That’s priceless for peace of mind and my skin’s well-being.
It’s a game-changer, truly.
Q: Making soap sounds incredibly complicated, maybe even a little dangerous with all those chemicals. Is it really something a complete beginner can do safely at home?
A: That’s a common misconception, and I definitely had my reservations at first, too! The idea of handling lye can sound intimidating, and I remember feeling a bit overwhelmed by the chemistry aspect when I first started looking into it.
But here’s the secret: with proper safety precautions, which are really just common sense kitchen safety, and a good, clear recipe, natural soap making is surprisingly straightforward and incredibly rewarding.
It’s more like baking than a science experiment! You’re essentially mixing fats and lye water, and a magical thing called saponification happens, transforming them into beautiful, gentle soap.
I started with a very basic recipe, wearing gloves and eye protection (just like I do when I’m deep cleaning with harsh products!), and followed the instructions meticulously.
The process is actually quite forgiving once you get the hang of it, and the satisfaction of seeing those raw ingredients turn into something so pure and useful?
Absolutely addictive. Don’t let the initial fear hold you back; it’s much simpler than it seems, and totally worth diving into!
Q: Okay, I’m intrigued! But what kind of cool ingredients can I actually put into my natural handmade soap to make it special? I don’t want it to be boring!
A: Oh, this is where the real fun begins and where you get to unleash your inner artisan! The beauty of making your own soap is that the customization possibilities are practically endless.
Forget boring, mass-produced bars! Once you’ve got your basic recipe down, you can start experimenting. I’ve personally experimented with everything from luxurious additions like creamy goat milk or hydrating colloidal oatmeal for extra skin softness, to vibrant natural colorants like spirulina for a lovely green hue or turmeric for a warm yellow.
And the scents! Instead of artificial fragrances that can be irritating, you can use pure essential oils like calming lavender, invigorating peppermint, or uplifting sweet orange.
I love adding a swirl of finely ground coffee for an exfoliating gardener’s soap, or a sprinkle of dried calendula petals for a gentle, visually appealing bar.
It’s like being a chef for your skin! Each batch becomes a reflection of your creativity and what your skin is craving, making every shower feel like a little spa moment.
You truly get to craft something unique and personal, which is honestly one of the best parts of this whole journey.